Complete Guide to Master Data Management in the Pharmaceutical Industry
Master data is the backbone of all operations in pharmaceutical manufacturing, quality control, and regulatory compliance. In this comprehensive guide, we break down each essential master data category — from Plant and Equipment to Label Master and User Roles. Learn what each dataset means, why it matters for GMP and 21 CFR Part 11 compliance, and how proper structuring ensures seamless integration with ERP, MES, LIMS, and WMS systems. Whether you're setting up a new system or auditing your existing data, this guide is your blueprint for building a reliable and compliant pharma data foundation.
Team DigitizerX | Pharma Digital Transformation Specialist
7/6/202526 min read


Purpose of Plant Master
This module allows users to create and update plant information in the system database. Each plant serves as the root node for all subsequent master data elements — such as sub-plants, departments, equipment, and materials.
Typical Data Fields in Plant Master
The following fields are configured and stored:
Plant ID – Unique identifier for the plant
Plant Description – Full name or descriptor of the plant
Sub Plant – Associated sub-unit or zone
Status – Active / Inactive
Tax Registration Number – For statutory compliance
License – Local manufacturing or distribution license info
GS1 Prefix – Global identifier for traceable barcodes
Address1 / Address2 – Physical address of the facility
Postal Code / City / State / Country – Full location details
Email – Official communication address
Phone Number – Site contact number
Website – Company or site-specific web presence
Process Steps for Creating Plant Master
Enter the Plant ID (unique code).
Input the Plant Description.
Specify the Sub Plant (use same as Plant ID if not applicable).
Select Status – Active or Inactive.
Fill in remaining details like address, license info, GS1 prefix, etc.
Save the information to update the central database.
Why Plant Master Matters in Pharma
Provides a central reference point for all operational data
Enables regulatory traceability at the site level
Supports multi-plant manufacturing and global supply chain
Ensures data consistency across integrated systems
🚚 Gate Master
The Gate Master plays a critical role in managing the physical entry and exit points of a pharmaceutical facility. All inward stock movements begin, and all outward movements conclude, through the gate. Maintaining accurate gate-level data ensures tight control over material flow, vehicle access, and GMP-compliant documentation — especially at the initial point of entry into the plant.
What is a Gate Master?
The Gate Master defines and controls the access points (gates) used for material, equipment, or personnel movement in and out of the facility. It acts as a primary checkpoint for generating gate passes, recording vehicle details, and ensuring that only authorized movements occur.
Key Data Fields in Gate Master
Plant Name – Name of the plant the gate belongs to
Plant ID – Linked unique plant identifier
Gate Code – Unique code for each gate (e.g., G01, G-Inward, G-Outward)
Gate Name – Descriptive name (e.g., Raw Material Inward Gate)
Alias – Alternate or short name (optional)
Status – Active / Inactive
Process Steps to Create Gate Master
Enter the Plant ID to link the gate to a plant.
Define a unique Gate Code.
Enter the Name and Alias for easier identification.
Set the Status (Active or Inactive).
Verify and enter all required fields.
Save the record to the central master database.
Why Gate Master Matters in Pharma
Acts as the first control point for all material movement
Enables generation of gate passes and real-time tracking of vehicles
Ensures regulatory compliance by logging entry/exit details
Helps enforce material movement SOPs tied to inward and outward logistics
Useful in tracking deviations, unplanned entries, or logistic delays
Use Case Example
When a raw material truck arrives, the gate security team generates a gate pass using the Gate Master data. This entry triggers the material receiving workflow in ERP or WMS and links to the inward documentation trail — ensuring traceability from the very first touchpoint.


What is a Sub Plant?
A Sub Plant is a subdivision of a larger plant. While the Plant Master defines the overall manufacturing facility, Sub Plants break it down into functional or regulatory zones — often tied to production lines, buildings, or GMP classifications (like RM Store, Dispensing Area, or Granulation Block).
Typical Data Fields in Sub Plant Master
Sub Plant ID – Unique identifier
Sub Plant Name / Description
Associated Plant ID
Status – Active or Inactive
Zone Classification – Optional: GMP area, Clean zone, etc.
Process Steps to Create a Sub Plant Master
Enter a unique Sub Plant ID
Provide a description (e.g., "Sterile Injectable Unit" or "Dispensing Area")
Select the Plant ID to link the sub-plant
Define the Status (Active/Inactive)
Save and validate in the central master database
Why Sub Plant Master Is Important
Allows functional segregation within a large facility
Improves workflow routing and access control
Enables system-level traceability (e.g., batch or material movement tracking within a zone)
Helps support compliance with regulatory zoning requirements
Use Case Example
In MES or ERP systems, when recording material movement or equipment use, the sub-plant helps narrow down the exact operational location — especially useful during audits and deviations.
Department Master
The Department Master defines the functional units within a pharmaceutical organization — from Production and Quality Assurance to Engineering and Warehouse. Properly maintaining department-level data ensures organizational clarity, workflow ownership, and seamless system integration in MES, ERP, and LIMS platforms.
What is Department Master?
A Department represents a distinct operational unit or team within a plant or sub-plant. Each department is responsible for specific processes like manufacturing, testing, packaging, or maintenance. The Department Master helps categorize user access, task assignments, material ownership, and process responsibility — forming the backbone of structured digital workflows.
Typical Data Fields in Department Master
Department Code – Unique short code (e.g., QA, QC, PRD)
Department Name / Description – Full name (e.g., "Quality Assurance")
Plant ID – Links the department to its plant
Area / Sub-Plant – Optional: associates the department with a zone
Status – Active / Inactive
Alias / Short Name – Common abbreviation (optional)
Process Steps to Create Department Master
Enter a unique Department Code (e.g., QA01).
Provide the Department Name/Description.
Link the department to the relevant Plant ID.
Optionally assign an Area or Sub-Plant.
Define the Status (Active or Inactive).
Save the details to the database.
Why Department Master Matters in Pharma
Defines functional responsibility across the organization
Supports workflow segregation (e.g., QA vs. Production)
Essential for role-based access control and audit trails
Enables clean hierarchy mapping in integrated digital systems
Aids in task routing, approvals, and deviation management
Use Case Example
In a digital SOP or deviation management system, workflows are often assigned to departments. For example, a deviation during granulation is automatically routed to the Production department, and escalated to Quality Assurance for final disposition — all driven by the Department Master setup.


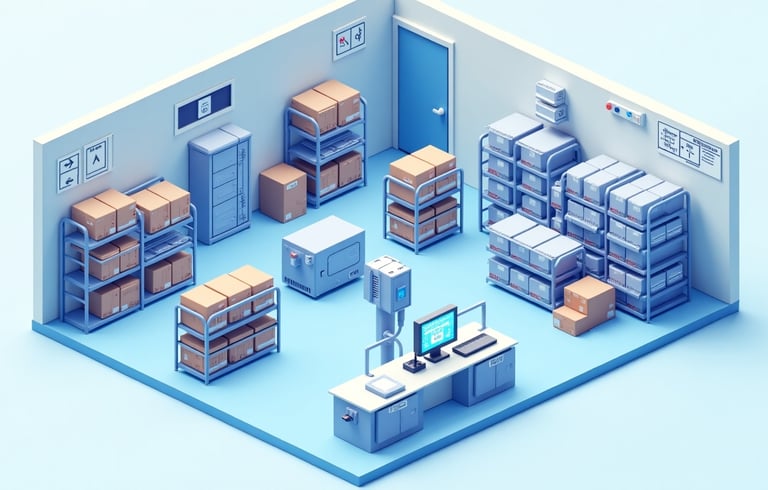
Location Master
The Location Master is a critical dataset used to define and control physical storage areas within a pharmaceutical facility — from warehouses and cold rooms to production cubicles and QA sampling zones. Each location is uniquely identified and labeled using a barcode, enabling real-time traceability, faster material movement, and temperature-sensitive storage management.
What is Location Master?
The Location Master defines every physical space in the plant where materials, products, or equipment are stored or handled. This includes rooms, racks, bins, cold storage units, and cleanroom areas. The system assigns each location a unique code and barcode label, enabling users to scan and track movements with accuracy.
Key Data Fields in Location Master
Location Code – Unique identifier for the location
Location Description – Full description (e.g., “RM Warehouse Rack A1”)
Storage Location Type – Defines the use: RM, PM, FG, Quarantine, etc.
Area – The department or zone the location belongs to
Plant ID – Links the location to the relevant plant
Zone – GMP classification or site zoning
Location Temperature – Current storage temperature setting
Temperature Unit – °C or °F
SLOC Type – System location type (e.g., Inventory, Production)
Level – Structural level (e.g., Level 0, Level 1, Mezzanine)
Process Steps to Create Location Master
Enter the Location Code.
Provide a Location Description (e.g., "Cold Storage Room - CS01").
Select the Storage Location Type (e.g., Raw Material, Quarantine).
Choose the relevant Area or department.
Fill in other fields such as temperature, zone, and plant ID.
Save the data to the central database.
Generate and print the location barcode, which can be affixed for scanning during material movement.
Why Location Master Matters in Pharma
Enables precise material traceability across storage areas
Supports barcode-based inventory management
Helps enforce GMP zoning and temperature compliance
Speeds up inward, transfer, and dispensing workflows
Minimizes mix-ups and location-based deviations
Essential for cold chain and controlled environment tracking
Use Case Example
When a material is received and inspected, it is assigned a final storage location (e.g., "RM-Rack-A3-Level 1"). The warehouse operator scans the location barcode during the put-away process, ensuring the system knows exactly where the material resides — enabling clean audit trails and fast retrieval.


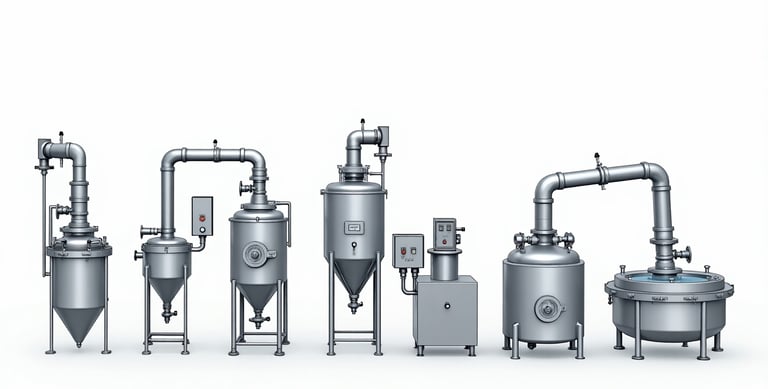
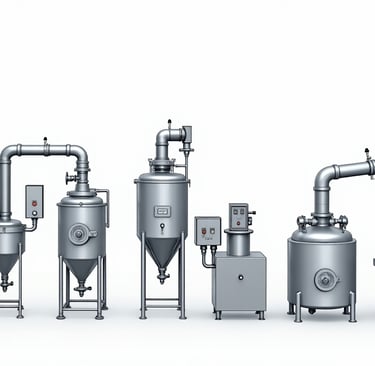
Equipment Master
In the pharmaceutical industry, equipment plays a vital role in product quality, process validation, and regulatory compliance. The Equipment Master provides a structured digital registry of all equipment used within the plant — from mixers and blenders to autoclaves, HVAC units, and balances. Each piece of equipment is uniquely identified and mapped to its physical location, department, cubicle, and sub-plant for seamless traceability and control.
What is Equipment Master?
The Equipment Master stores comprehensive information about all manufacturing and utility equipment across the facility. It connects each equipment record to its exact location, cubicle, operational area, and responsible department, ensuring consistent use, calibration, maintenance tracking, and audit readiness.
Key Data Fields in Equipment Master
Equipment ID – Unique identifier for the equipment
Equipment Name – Descriptive name (e.g., "Granulator", "Air Handling Unit")
Equipment Type – Category such as Utility, Production, Packaging, QC, etc.
Cubicle ID / Cubicle Name – The cubicle in which the equipment is installed
Location Code / Description – Physical storage or installation area
Location Type – Cleanroom, Warehouse, QC Lab, etc.
Department ID / Department Name – Responsible department (e.g., Engineering, QA)
Sub Plant ID / Sub Plant Name – Operational sub-zone of the equipment
Status – Active / Inactive
Process Steps to Create Equipment Master
Assign a unique Equipment ID.
Enter the Equipment Name and Type.
Link the equipment to a specific Cubicle ID and Cubicle Name.
Input the Location Code, Description, and Location Type.
Associate the equipment with the correct Department and Sub Plant.
Set the Status to Active or Inactive.
Save and register the equipment in the master database.
Why Equipment Master Matters in Pharma
Enables equipment traceability and lifecycle management
Ensures equipment is used only in validated zones and processes
Supports preventive maintenance, calibration, and cleaning records
Prevents cross-contamination by tying equipment to specific cubicles
Essential for audit trails, 21 CFR Part 11 compliance, and MES integration
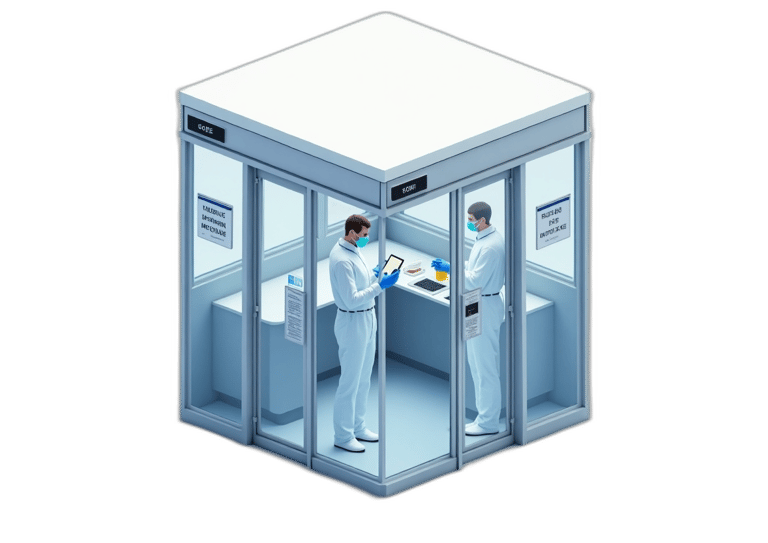
Cubicle Master
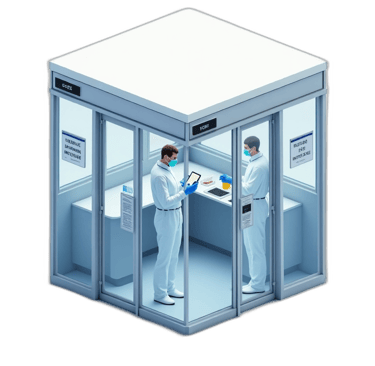
In pharmaceutical environments, cubicles are specialized enclosed spaces designed for specific operations such as dispensing, sampling, or granulation. These zones are critical to GMP compliance as they limit access, control environmental conditions, and define where sensitive processes occur. The Cubicle Master serves as the digital registry of all cubicles — linking them to departments, sub-plants, and locations, while enabling precise access control and traceability.
What is Cubicle Master?
The Cubicle Master allows organizations to digitally manage cleanroom cubicles, weighing rooms, sampling areas, or any controlled operational spaces. Each cubicle is uniquely identified and tied to its physical location, department, and sub-plant structure, helping enforce strict operational zoning and procedural compliance.
Key Data Fields in Cubicle Master
Cubicle ID – Unique system-generated identifier
Cubicle Name – Functional name of the cubicle (e.g., “Dispensing Cubicle A”)
Location Code – Associated storage or operational location code
Location Description – Description of the physical or mapped location
Location Type – Category such as RM, PM, FG, Quarantine, etc.
Department ID – Unique identifier for the responsible department
Department Name – Full name of the department (e.g., Quality Control)
Sub Plant Name – Name of the sub-unit within the plant
Sub Plant ID – Unique identifier for the sub-plant
Status – Active / Inactive
Process Steps to Create Cubicle Master
Enter the Cubicle ID and Cubicle Name.
Enter the Location Code, Description, and Location Type.
Link the cubicle to its Department ID/Name.
Associate the cubicle with the correct Sub Plant ID/Name.
Set the Status to Active or Inactive.
Save the record to the centralized database for use across ERP, MES, or WMS systems.
Why Cubicle Master Matters in Pharma
Supports GMP zoning and environmental segregation
Links operational spaces to departments and sub-plants for traceability
Enables workflow routing, equipment assignment, and user-based access control
Prevents unauthorized access and ensures audit trail of cubicle usage
Critical for cleanroom management, cross-contamination control, and compliance validation
Use Case Example
A QA cubicle for sampling raw materials is assigned to the Quality Assurance department in Sub Plant 1. The cubicle is linked to Location Code LOC-RM-QA01, and only users with appropriate department-level access can log actions performed inside it — ensuring compliance and traceability during audits.
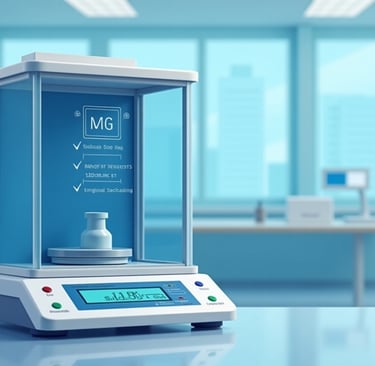
Weighing Balance Master
Weighing balances are among the most critical instruments in pharmaceutical manufacturing, especially in dispensing, sampling, and formulation areas. The Weighing Balance Master is a centralized dataset that records all technical, compliance, and calibration-related information for each balance in the facility — ensuring accuracy, traceability, and audit readiness at every stage of material handling.
What is Weighing Balance Master?
The Weighing Balance Master maintains detailed records of each balance’s identity, location, technical specs, verification parameters, and calibration schedules. This ensures GMP compliance, supports integration with MES/LIMS systems, and allows precise control over material weighing — a fundamental requirement in pharmaceutical manufacturing.
Key Data Fields in Weighing Balance Master
Identification & Technical Details:
Weighing Balance ID – Unique identifier
WB Description – Name or description (e.g., “Dispensing Balance - Room A”)
WB Type – Analytical, Precision, Top-loading, etc.
Make / Model – Manufacturer and model details
Unit of Measurement – e.g., g, mg, kg
Capacity – Max load (e.g., 3 kg)
Least Count (%) and Digit After Decimal – Measurement resolution
Minimum/Maximum Operating Capacity – Operational range
Location & Department Mapping:
Cubicle ID / Cubicle Name
Location Code / Description / Location Type
Department ID / Department Name
Sub Plant ID / Sub Plant Name
Connectivity (if integrated digitally):
IP Address
Port Number
Verification & Calibration:
Stamping Done On / Due On
Daily Verification Weights:
Standard Weight 1st
Standard Weight 2nd
Standard Weight 3rd
Monthly Calibration Weights:
Standard Weight 1st
Standard Weight 2nd
Standard Weight 3rd
Performance Parameters:
Eccentricity Acceptance Value
Linearity Acceptance Value
Repeatability Acceptance Value
Uncertainty Acceptance Value
%RSD Value
Standard Deviation Value
Mean Value
Formula Used (for calculation if auto-integrated)
Status: Active / Inactive
Process Steps to Create Weighing Balance Master
Assign a unique Weighing Balance ID and description.
Enter technical specs like type, make, model, capacity, and UOM.
Link the balance to the appropriate cubicle, location, and department.
Input connectivity details (IP, Port) for integration with MES.
Configure daily verification and monthly calibration weights.
Set performance acceptance values (e.g., linearity, RSD).
Enter the last stamping date and due date.
Mark the status and save the record in the master database.
Why Weighing Balance Master Matters in Pharma
Ensures accuracy and consistency in all critical weighing operations
Supports 21 CFR Part 11 and GMP compliance
Centralizes performance, verification, and calibration records
Enables integration with MES / SCADA systems for real-time checks
Provides audit trail for regulators and QA reviewers
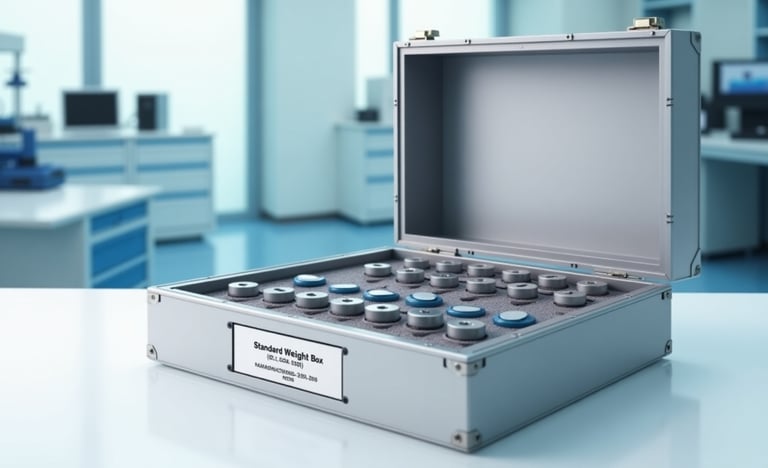
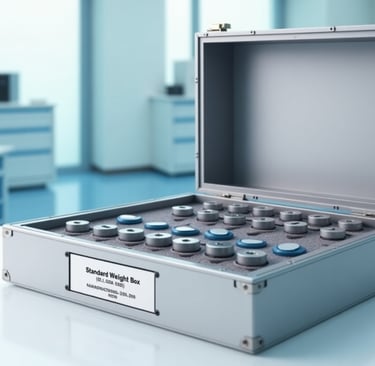
What is a Standard Weight Box Master?
The Standard Weight Box Master is a digital registry that tracks all certified weight boxes used for calibration and verification of balances. Each box contains pre-certified weights, and this master data ensures each is stored correctly, regularly verified, and traceable back to its responsible department and sub-plant.
Key Data Fields in Standard Weight Box Master
Standard Weight Box ID – Unique identifier for each weight box
Location Code – Code of the location where the box is stored
Location Description – Details of the storage area (e.g., “Calibration Room - Lab A”)
Location Type – Room type (e.g., QA Lab, Engineering Bay)
Department ID – Linked department code
Department Name – Responsible department (e.g., Quality Assurance)
Sub Plant Name – Associated sub plant (e.g., QA Block, Production Zone 2)
Sub Plant ID – Unique identifier for the sub plant
Status – Active / Inactive (used for verification scheduling and availability)
Process Steps to Create Standard Weight Box Master
Assign a unique Standard Weight Box ID.
Enter Location Code, Location Description, and Location Type.
Associate the box with the correct Department and Sub Plant.
Set the current status (Active / Inactive).
Save the record to the centralized master database.
Use the master data during verification or calibration to track usage and compliance.
Why Standard Weight Box Master Is Important
Ensures traceability of calibration tools used in critical GMP processes
Links physical weights to specific locations and departments for accountability
Prevents usage of inactive, expired, or misplaced weight sets
Supports regulatory audits by maintaining equipment-certification trails
Simplifies planning of daily verification and monthly calibration activities
Use Case Example
A standard weight box (ID: SWB-102) is stored in the QA Lab of Sub Plant SP2. It is linked to specific analytical balances used in daily verification. When QA personnel perform balance checks, the system references the Standard Weight Box Master to ensure the correct certified weights are being used — maintaining data integrity and compliance.

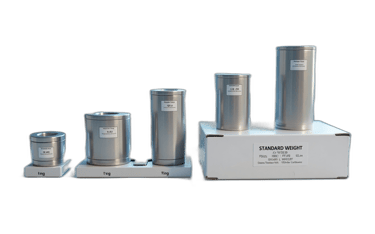
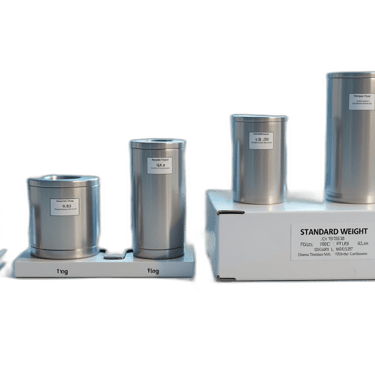
Standard Weight Master
Standard weights are precision reference tools used to perform daily verification and routine calibration of weighing balances in the pharmaceutical industry. The Standard Weight Master keeps a centralized record of each certified weight, ensuring traceability, location control, and regulatory compliance.
What is Standard Weight Master?
The Standard Weight Master maintains digital records of individual standard weights used within a weight box. It helps track critical details such as capacity, associated weight box, location, and department. This data is essential to ensure that only certified, properly stored, and valid standard weights are used for equipment verification and calibration.
Key Data Fields in Standard Weight Master
Standard Weight ID – Unique identifier for each individual weight
Standard Weight Description – Description (e.g., “20g SS Weight - Class 1”)
Capacity – Actual weight (e.g., 1g, 100g, 500g)
Standard Weight Box ID – Links the weight to a specific certified box
Location and Responsibility:
Location Code – Code of the storage or usage area
Location Description – Physical place (e.g., “QA Calibration Room”)
Location Type – Type of zone (e.g., QA, QC, Production)
Department ID / Department Name – Responsible department
Sub Plant ID / Sub Plant Name – Operational zone assignment
Status – Active / Inactive (used or not in use)
Process Steps to Create Standard Weight Master
Assign a unique Standard Weight ID.
Provide the description and capacity.
Link the weight to a Standard Weight Box ID.
Add location details — code, description, and type.
Associate with the correct department and sub plant.
Set the status (Active/Inactive).
Save to the centralized master data system for audit and operational use.
Why Standard Weight Master Is Important
Enables individual traceability of calibration weights
Prevents use of incorrect or unverified weights
Supports weight rotation, cleaning, and maintenance logs
Ensures compliance with pharmacopoeia standards and GMP audit trails
Essential for validating critical weighing steps in QA, QC, and manufacturing
Use Case Example
A 200g Class 1 weight (Standard Weight ID: SW-200G-01) is part of a verified weight box used in the QA sampling room. It is linked to Sub Plant SP-QA1, and its location and status are monitored daily. Before each weighing verification, MES or LIMS systems check the Standard Weight Master to confirm eligibility and prevent deviation.
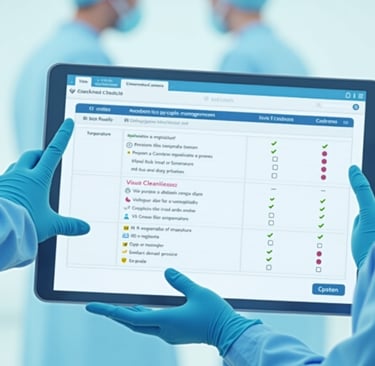
📋 Checklist Master
In the pharmaceutical industry, checklists are vital tools to ensure SOP adherence, regulatory compliance, and operational consistency across GMP workflows. The Checklist Master centralizes and standardizes these checklists across departments, plants, and systems — helping streamline quality control and audit preparedness.
What is Checklist Master?
The Checklist Master defines and manages the structure of digital or manual checklists used for operations such as equipment cleaning, calibration, material inspection, safety checks, and more. Each checklist item is linked to a module (like QA, Production, Warehouse) and configured with specific acceptance criteria and input types.
This master is critical for enforcing consistency in routine and critical processes.
Key Data Fields in Checklist Master
Check List Code – Unique identifier for the checklist (e.g., CHK-EQC-001)
Name – Descriptive name (e.g., “Daily Equipment Cleaning Checklist”)
Plant ID – Links the checklist to a specific plant location
Module – The functional area it applies to (e.g., QA, WMS, MES, Production)
Input Value Required – Yes/No toggle indicating if a user must enter a value
Value Tag – Placeholder or field name (e.g., “Temperature”, “Cleaning Status”)
Acceptance Value – Allowed response types (Yes / No / NA)
Status – Active / Inactive
Process Steps to Create a Checklist Master Entry
Assign a unique Checklist Code and provide a clear name.
Link it to the relevant Plant ID and functional module.
Define whether input is required (e.g., numeric value, date, checkbox).
Enter the Value Tag representing the type of input (e.g., "Pressure").
Specify acceptable values — Yes, No, or NA.
Set the status of the checklist (Active / Inactive).
Save to the central database to make it available during SOP workflows or digital task execution.
Why Checklist Master Is Important in Pharma
Ensures consistency and completeness in routine operations
Enables role-based, system-guided checks for MES or LIMS integration
Prevents human error with predefined inputs and validation rules
Facilitates GMP-compliant documentation and audit traceability
Drives data integrity and workflow accountability
Use Case Example
In a digital MES system, before starting a batch, an operator is prompted with the “Pre-Operation Equipment Checklist” (CHK-PREOP-001). Each item requires a Yes/No response. Inputs such as temperature and cleaning status must match the tagged acceptance values. This structure is pre-defined in the Checklist Master and tracked for every operation.
Device Master
In today’s digital pharmaceutical landscape, connected devices play a critical role in data capture, real-time monitoring, and process automation. The Device Master is a centralized registry that manages all digitally integrated hardware — such as printers, barcode scanners, sensors, and instruments — by assigning them unique IDs, IP configurations, and descriptions.
What is Device Master?
The Device Master is used to register and maintain digital device identities within a pharmaceutical plant or system infrastructure. This includes devices integrated with MES (Manufacturing Execution Systems), WMS (Warehouse Management Systems), LIMS (Laboratory Information Management Systems), and standalone validation tools.
Each device is uniquely identified and configured with its communication details (e.g., IP address and port number), enabling seamless integration, traceability, and secure system interaction.
Key Data Fields in Device Master
Device ID – A unique identifier for the device (e.g., DV-001, SCN-202)
Device Name – Name of the device (e.g., “Barcode Scanner 1”, “Dispensing Printer A”)
Device Description – Purpose or location (e.g., “Used in Raw Material Sampling Area”)
IP Address – Static IP for device communication in the network
Port Number – Port assigned for communication or data transfer
Process Steps to Create Device Master Entry
Assign a unique Device ID.
Enter the Device Name and a meaningful Description.
Assign the device's IP Address as configured in your network.
Enter the designated Port Number (used by the MES or integration service).
Save to the Device Master to allow integration and control.
Why Device Master Is Important in Pharma
Enables secure integration of devices with MES, LIMS, WMS, or ERP systems
Ensures traceable data capture from physical equipment
Helps maintain network-level control of system devices
Prevents configuration errors with a central source of truth
Supports 21 CFR Part 11 and data integrity through system mapping
Use Case Example
In a dispensing cubicle, a barcode scanner (Device ID: SCN-102) is assigned to IP: 192.168.1.25 and Port 8080. During MES execution, scanned data is captured and linked to the batch. The Device Master ensures that the scanner is authorized, functional, and mapped correctly — reducing the risk of errors or data loss.

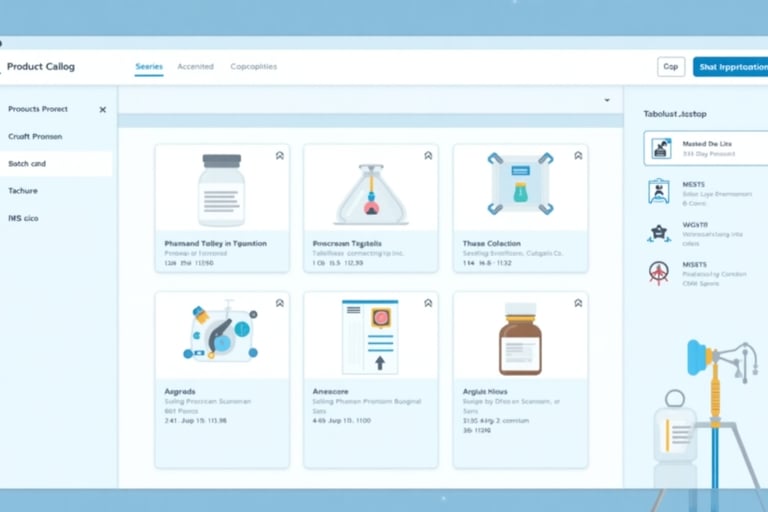
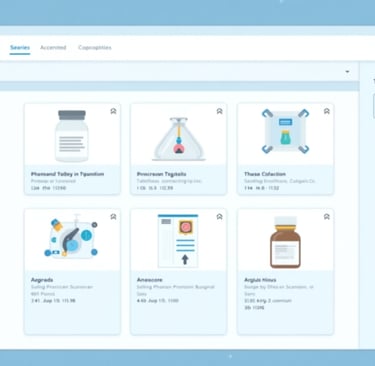
Product Master
The Product Master is the foundation of every manufacturing, quality, and inventory process in the pharmaceutical industry. It defines each product with a unique identity and key specifications like batch size — ensuring consistent manufacturing, regulatory alignment, and data traceability throughout the product lifecycle.
What is Product Master?
The Product Master maintains core data for all pharmaceutical products manufactured or managed within a facility. It includes a unique product code, detailed description, and batch size specifications (usually in kilograms). This data is essential for production planning, BOM (Bill of Materials) creation, recipe execution in MES, and integration with quality systems and regulatory filings.
Key Data Fields in Product Master
Product Code – Unique identifier for the product (e.g., PRD-001, TAB-PARA500MG)
Product Description – Name and detail of the product (e.g., “Paracetamol 500 mg Tablets – Film Coated”)
Batch Size (KG) – Standard approved batch size used in manufacturing (e.g., 250.00 kg)
Process Steps to Create Product Master
Assign a unique Product Code.
Enter the complete Product Description, including strength and dosage form.
Specify the Batch Size (in KG) — aligned with formulation, equipment capacity, and regulatory submission.
Save and link the product master to related masters like Material Master, UOM, Route Master, and Label Master.
Why Product Master Is Important in Pharma
Forms the core identity of a product in MES, ERP, LIMS, and QA systems
Ensures standardized batch execution and batch record generation
Used in SOPs, BMRs, and electronic batch records (EBRs)
Critical for regulatory documentation and change control
Supports version control, product lifecycle management, and compliance
Use Case Example
When preparing to manufacture a batch of Paracetamol 500 mg tablets, MES pulls the Product Code: TAB-PARA500MG and uses the batch size of 250 kg to calculate required materials, assign equipment, and generate the eBMR. The Product Master ensures the correct specification is used every time.


Material Master
In pharmaceutical manufacturing, every process starts with raw or packaging materials — and each of those begins with accurate master data. The Material Master is the definitive digital source for managing and identifying materials across formulation, production, quality control, and inventory systems.
What is Material Master?
The Material Master defines and stores detailed information about raw materials, packaging components, excipients, actives, and finished goods. This centralized record includes unique codes, descriptions, and units of measure, enabling seamless integration across MES, ERP, and LIMS platforms. Without a well-structured Material Master, batch formulation, label generation, and GMP traceability can all break down.
Key Data Fields in Material Master
Material Code – Unique system identifier for the material (e.g., RM-00125)
Material Name – Common name or type (e.g., “Microcrystalline Cellulose”)
Material Description – Extended detail for clarity and compliance (e.g., “MCC PH 102 – White Powder – Excipient”)
UOM (Unit of Measure) – Standard measurement unit (e.g., kg, g, L)
Numerator / Denominator – Used to define unit conversion ratios (e.g., 1000 g = 1 kg)
Status – Active / Inactive (controls material availability for transactions)
Process Steps to Create Material Master
Assign a unique Material Code.
Enter the Material Name and Material Description clearly.
Specify the UOM and assign the conversion ratio using numerator and denominator.
Set the Status (Active or Inactive) to control usage.
Save the data and link it to associated modules like BOM, Product Master, and Warehouse Inventory.
Why Material Master Is Important in Pharma
Forms the foundation for BOMs, formulations, and batch records
Ensures GMP traceability of every ingredient and component
Links directly with MES, WMS, and QA systems for seamless operations
Prevents duplication and inconsistency in material definitions
Supports automated weighing, label printing, and compliance auditing
Use Case Example
During dispensing, MES pulls material data from the Material Master — for example, Material Code RM-00125, labeled as “Microcrystalline Cellulose.” The system verifies the UOM as kg, applies the correct conversion, and logs usage against the batch record, all driven by the master data.
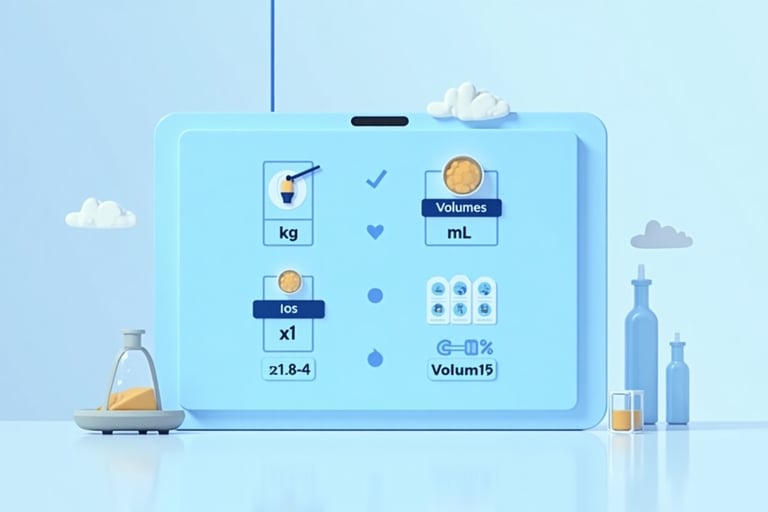
⚖️ UOM (Unit of Measurement) Master
In pharmaceutical manufacturing, accuracy in measurement is non-negotiable. Whether dispensing raw materials or recording test results, the system must know exactly how quantities are defined and converted. The UOM Master serves as the foundation for this — defining and standardizing measurement units across all operations.
What is UOM Master?
The Unit of Measurement (UOM) Master is a centralized database that defines how quantities are measured, recorded, and converted across systems like MES, ERP, LIMS, and WMS. It enables uniformity, clarity, and conversion consistency when dealing with weights, volumes, counts, or lengths — ensuring data integrity and GMP compliance.
Key Data Fields in UOM Master
UOM Code – Unique identifier for the unit (e.g., UOM001)
Name – Descriptive name (e.g., "Kilogram", "Milliliter")
UOM – Standard abbreviation (e.g., kg, mL, Ltr, Nos)
Numerator Value – Top value for conversion (e.g., 1000)
Denominator Value – Bottom value for conversion (e.g., 1 for 1000 g = 1 kg)
Status – Active / Inactive (determines usage in master data and transactions)
Process Steps to Create UOM Master
Define a unique UOM Code for the measurement unit.
Enter the Name and its standard abbreviation (UOM).
Assign the Numerator and Denominator Values for accurate conversions (e.g., 1000 g = 1 kg → Numerator: 1000, Denominator: 1).
Set the Status to Active or Inactive.
Save and integrate into systems that manage batch size, material issue, warehouse movement, etc.
Why UOM Master Matters in Pharma
Ensures measurement consistency across all production and quality systems
Supports automated conversions (e.g., grams to kilograms)
Prevents miscommunication and human error in manual entries
Links with Material Master, Product Master, Inventory, and Batch Records
Essential for regulatory compliance, particularly in batch documentation and electronic records
Use Case Example
When dispensing 1.5 kg of a material stored in grams, the MES uses the UOM Master to convert and validate the input based on the ratio defined in the UOM entry (e.g., 1 kg = 1000 g). This ensures that dosing, labeling, and inventory records stay accurate and aligned.


👤 User Master
In a regulated pharmaceutical environment, every digital action must be traceable, secure, and role-based. The User Master is the foundation for managing system access and tracking user activity across modules like Warehouse, QA, QC, Production, and Engineering. It ensures that only authorized personnel perform specific actions — maintaining compliance with 21 CFR Part 11 and GMP requirements.
What is User Master?
The User Master is a centralized registry of all individuals authorized to operate within the system. Each user is defined by their personal identity, organizational role, operational mode (e.g., QA, Warehouse), and digital signature. This master also integrates with the organization's Active Directory (AD) to ensure enterprise-level security and single sign-on (SSO).
Key Data Fields in User Master
Plant ID – Location where the user is based or authorized to work
User ID – Unique login ID for authentication
First Name / Middle Name / Last Name – Full legal name
Designation – Role in the organization (e.g., Associate, Supervisor, HOD)
Employee Code – Internal HR reference
Email ID – Used for system alerts and recovery
E-Signature – Authorized digital signature used in MES, LIMS, or audit trails
Mode – Operational area (Warehouse / Production / QA / QC / Engineering / Others)
Status – Active / Inactive (to control access based on employment or authorization status)
Process Steps to Create User Master Entry
Select the Plant ID where the user will operate.
Assign a unique User ID and enter the user’s full name.
Define their Designation and link the Employee Code.
Enter their Email ID and configure their E-signature.
Select the appropriate Mode (e.g., QA, Production).
Set the Status (Active / Inactive).
Upon save, the user profile integrates with Active Directory for authentication.
Why User Master Is Essential in Pharma
Establishes secure access control for GMP systems
Ensures every digital action is attributable to an individual user
Enables role-based rights management and segregation of duties
Provides full audit trail for all MES, LIMS, WMS, or ERP interactions
Supports 21 CFR Part 11 and Annex 11 compliance with electronic signatures
Use Case Example
During batch manufacturing, a QA operator logs into the MES using their User ID and e-signature. Every action — from material issuance to batch approval — is tracked under their identity. If the user becomes inactive or is reassigned, their access is updated in the User Master, ensuring system integrity.
👥 User Group Master
As pharmaceutical operations scale, managing individual user rights becomes increasingly complex. That's where the User Group Master comes in — enabling role-based access control by organizing users into logical, predefined groups. This enhances efficiency, security, and GMP compliance by controlling system access based on responsibilities and departments.
What is User Group Master?
The User Group Master is a central module used to assign users to functional groups, such as QA Operators, Production Supervisors, Warehouse Staff, or System Auditors. Each group can then be assigned specific access rights and module permissions, streamlining user management and reducing risk.
Rather than assigning rights to users individually, grouping allows batch permission control, ensuring consistency and reducing administrative effort.
Key Data Fields in User Group Master
Group ID – Unique identifier for the user group (e.g., GRP-QA01, GRP-WHS02)
User ID – IDs of users assigned to this group (multiple users per group possible)
Process Steps to Manage User Group Master
Create a Group ID for a specific department or functional role.
Add one or more User IDs under this group.
Assign module-level rights to the group using the Module Rights Master.
Update or remove users as responsibilities evolve.
Save the group data to apply access rights across the system.
Why User Group Master Is Essential in Pharma
Simplifies access control across MES, WMS, and ERP platforms
Reduces administrative overhead for user management
Enhances security and role-based compliance
Enables fast onboarding/offboarding of users with consistent permissions
Supports GxP audit readiness by documenting who has access to what, and why
Use Case Example
A new QA Associate joins the company. Instead of manually assigning rights, the admin adds their User ID to the QA Operator Group (GRP-QA01). This automatically grants access to relevant MES modules, forms, and reports — all based on predefined group settings.


Module Rights Master
In a highly regulated pharmaceutical environment, not every user should access every screen or function. That’s where the Module Rights Master comes in. It ensures users can only view or interact with the modules and screens necessary for their roles — reducing risk, improving security, and ensuring compliance with data access controls outlined in 21 CFR Part 11 and Annex 11.
What is Module Rights Master?
The Module Rights Master defines which user groups have access to which modules or screens within the system — such as Production Execution, Quality Review, Warehouse Receiving, or Equipment Calibration. These rights are mapped at the group level, meaning that once a user is added to a group (via the User Group Master), they inherit all associated permissions automatically.
This centralization enables quick configuration, role-based access control, and ensures audit trails are strictly controlled.
Key Data Fields in Module Rights Master
Group ID – Identifier of the user group (e.g., GRP-QC01, GRP-WHS02)
Module / Screen Names – List of screens, forms, or functional areas the group is allowed to access (e.g., “Weighing Balance Master”, “Batch Approval Form”, “Gate Entry Screen”)
Process Steps to Configure Module Rights Master
Select a Group ID from the User Group Master.
Choose the list of modules or screens that the group should access.
Configure the type of access if applicable (e.g., View, Edit, Approve, Reject).
Save the rights mapping so it’s enforced across the system.
Any user in the group automatically inherits these permissions.
Why Module Rights Master Is Critical in Pharma
Enforces role-based access control in compliance with regulatory standards
Prevents unauthorized data access, changes, or approvals
Enables secure operation of MES, LIMS, ERP, and warehouse platforms
Reduces administrative errors and manual permission assignment
Creates a clear, auditable map of who has access to what and why
Use Case Example
The Production Operator Group (GRP-PRD01) is granted access to “Batch Execution Screen”, “Weighing Log”, and “Dispensing Checklist”. They cannot view or edit QA Approval Forms, which are only accessible to the QA Review Group. These rights are managed from the Module Rights Master, ensuring separation of duties and data control.
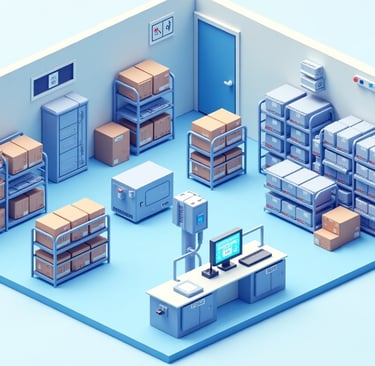
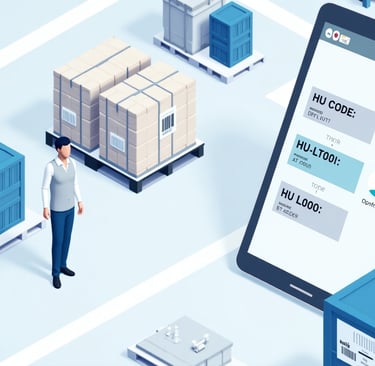
Handling Unit (HU) Master
In pharmaceutical warehousing and logistics, controlling how goods are packaged, transported, and tracked is critical for maintaining GMP compliance and traceability. The Handling Unit (HU) Master is the backbone of this control — enabling digital identification of every physical packaging unit, from pallets to cartons.
What is a Handling Unit?
A Handling Unit (HU) is a physical unit consisting of packaging material (e.g., pallet, carton, bin) and the product(s) contained within it. Each HU is assigned a unique HU Code, a description, and a type — allowing the system to track where and how it moves, is stored, or is used during production.
Handling Units can be used at any point in the material lifecycle, including goods receipt, warehousing, movement, dispensing, and shipment. This master ensures that each unit is properly recorded and traceable.
Key Data Fields in HU Master
Plant ID – The plant or warehouse where the handling unit is used
HU Code – A unique identifier for the handling unit (e.g., HU-PLT-001)
Name – A user-friendly name or description (e.g., “Pallet with 10 boxes of API”)
HU Type – Type of handling unit (e.g., Pallet, Crate, Carton, Bin)
Status – Active / Inactive (based on usage, damage, or deactivation)
Process Steps to Create HU Master Entry
Select the Plant ID where the HU will be used.
Enter a unique HU Code.
Add a clear Name or Description to identify the HU’s content or format.
Specify the HU Type (e.g., Pallet, Tote, Shipper).
Set the Status to Active or Inactive.
Save the details to the system — making the HU available for goods receipt, movement, or packing operations.
Why HU Master Is Important in Pharma
Supports unit-level traceability for materials and products
Integrates with WMS, MES, and barcode systems
Ensures standardized packaging and handling formats
Helps comply with GMP and data integrity requirements
Facilitates efficient warehouse operations, including scanning and labeling
Use Case Example
At goods receipt, a pallet containing 20 boxes of excipient is assigned HU Code: HU-RM-EXC20 and labeled accordingly. The HU is scanned into the WMS system and tracked as it moves to quarantine, sampling, and final storage. The HU Master ensures that its structure and type are consistently recognized across systems.

Label Master – Versioned Label Control Across Departments
In the pharmaceutical industry, labeling is more than just printing product names or barcodes — it's a regulated, traceable, and version-controlled activity. The Label Master enables centralized management of all label formats, print files (PRNs), and version histories across departments like Warehouse, Production, Quality Control (QC), Engineering, and Quality Assurance (QA).
This structured master ensures that the right label — in the correct format and version — is printed at the right time, avoiding compliance issues and mislabeling errors.
What is Label Master?
The Label Master is a centralized module that stores and manages department-specific label templates, mapped by label type, version, and associated PRN (Printer) files. These labels are linked to master data such as materials, equipment, sampling status, storage locations, and batch information.
Each department has unique labeling needs:
Warehouse – Material labels, quarantine labels, bin labels
Production – In-process, dispensed, rejected, sampled, or cleaned labels
QC – Sample analysis tags, instrument calibration labels
Engineering – Equipment calibration, maintenance status tags
QA – Released, Rejected, and Approved labels for quality-controlled items
The Label Master ensures consistency, version traceability, and linkage to the correct printing logic.
Key Features of Label Master
Department Tagging – Assign each label to a specific department (Warehouse, Production, QC, QA, Engineering)
Label Type – Define label purpose (e.g., “Sample Under Test”, “Material Quarantined”, “Cleaned Equipment”)
Version Control – Maintain multiple versions with change history for audit readiness
PRN File Mapping – Attach the corresponding .prn file for each version to ensure standard formatting
Status – Active / Inactive based on usability and approval
Process Steps to Maintain Label Master
Select or create a Label Type and assign it to a Department.
Upload or link the correct PRN file (Print Format File) for printing templates.
Enter Version Number, description of the change, and assign a status.
Store each version for audit history and rollback purposes.
Make the label available in MES, WMS, or LIMS modules via API or print triggers.
Why Label Master Is Crucial in Pharma
Ensures label accuracy and version integrity across all departments
Maintains audit trail of label updates — essential for GMP and 21 CFR Part 11
Prevents incorrect label printing due to outdated formats
Enables integration with barcode printers and automated systems
Supports multi-language or regulatory-specific label variants
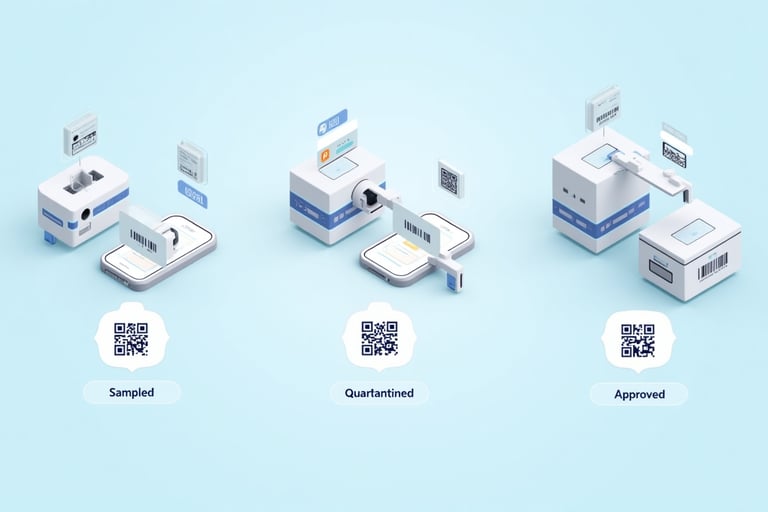
Enhanced Traceability with QR Codes on Labels
To take pharmaceutical labeling to the next level, the Label Master supports the integration of QR codes on every label — enabling real-time tracking of each unit, stage, and user interaction.
Each QR code can embed vital metadata such as:
Material or Product Code
Batch/Lot Number
Status (e.g., Sampled, Approved, Rejected)
User ID or Role who performed the action
Timestamp
Plant / Sub Plant / Equipment
System-generated tracking URL or Document ID
When scanned by handheld scanners, mobile apps, or MES-integrated devices, the QR code:
Instantly pulls up relevant batch or material history
Verifies label version and status
Links to electronic records or audit trails
Allows QA, QC, or warehouse staff to verify and update statuses on the go
Real-Life Example
A warehouse operator scans a label on a quarantined material. The QR code fetches the material record from the WMS, showing:
Material Code: RM-1234
Status: Quarantined
Received On: 05-Jul-2025
Sample Collected: Yes
Current Location: Bin A-12
After sampling and approval, a new Approved label is printed with a new QR code reflecting updated status and timestamp — all recorded in the MES/WMS audit trail.
🖨️ Label Design with QR Integration
Each label type (e.g., “Sampled”, “Cleaned”, “Rejected”) can be configured with:
A text block (description, date, name)
A barcode or QR code linked to the record in MES or WMS
Optional elements like user initials, equipment ID, or SOP reference
These labels are stored in the Label Master, versioned with PRN files, and pushed to GMP-compliant printers for physical application.
Use Case Example:
The QA department updates the “Approved Material” label to include QR code and reviewer initials. A new PRN file is uploaded and assigned Version 2.0. The Label Master retains both the old and new versions with timestamps and change notes. MES is updated to use Version 2.0 for new batches only.